Schedule Netlify deploys using GitHub Actions
I recently rebuilt the Founders and Coders website using the Eleventy static site generator. I hit an interesting problem making an events page: I wanted the page to be up-to-date every day, which is hard when your site is just a collection of HTML files. I could have used client-side JS to fetch the event schedule and render them, but that felt like cheating when the rest of the site is fully static. Instead I decided to rebuild and re-deploy the site at midnight every day.
Scheduling Netlify deploys
Netlify is a fantastic place to deploy static sites, but they have no built-in way to schedule a deploy. They do however provide “build hooks”. These are URLs that trigger a build when they receive a POST request.
Previously I had played with Zapier, setting up a scheduled task that hit the Netlify build hook. This never felt right to me though: this one (crucial!) part of the site’s config lived on a totally separate platform with a different login. It’s easy to imagine someone else taking over maintenance of the site and not knowing the Zapier task was there.
Ideally I wanted a way to have the schedule config live in the GitHub repo where the code is.
GitHub Actions
Recently GitHub launched their Actions platform. This is a Continuous Integration service (like Travis), allowing you to run tests, deploy packages and all the other stuff CI is used for.
The best part is you can schedule an Action using CRON syntax. Rather than running (for example) on every push to the repo, the Action will run at the time and date you specify.
This is exactly what I needed. GitHub Actions are configured with a yaml file in the repo itself, alongside all the code.
Configuring
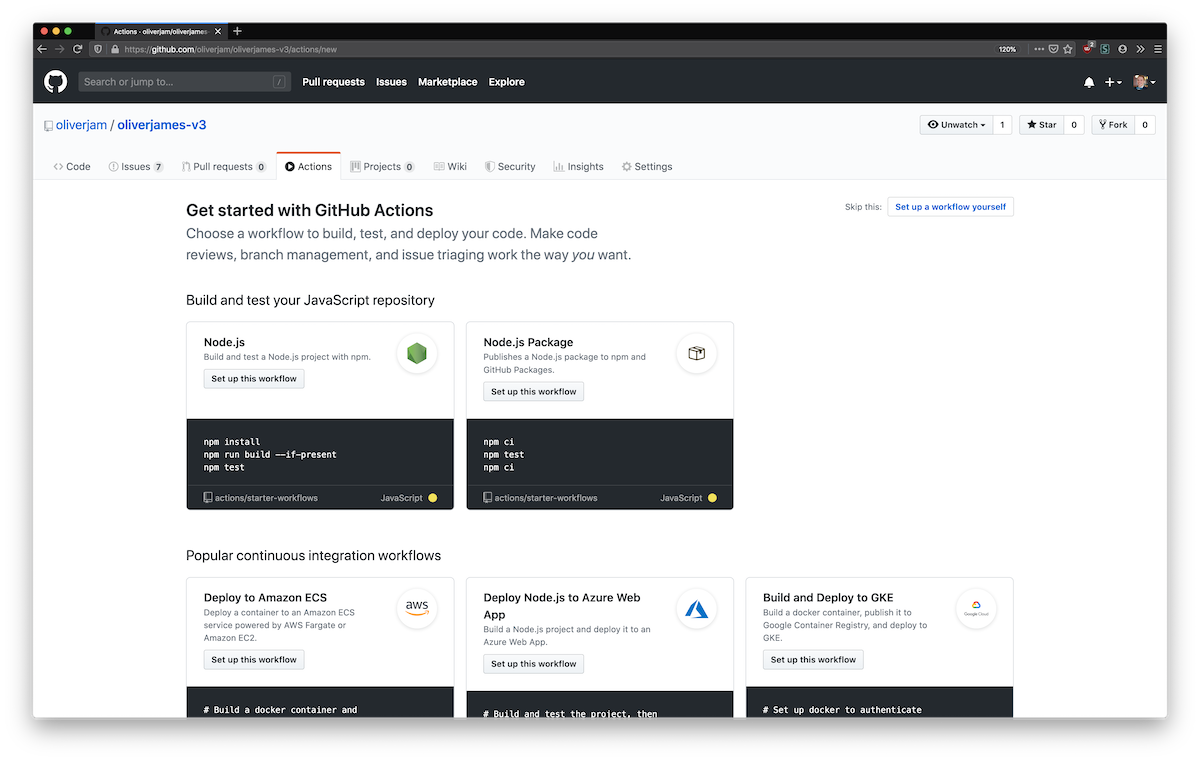
The easiest way to create an Action is to click the “Actions” tab on your repo on GitHub.

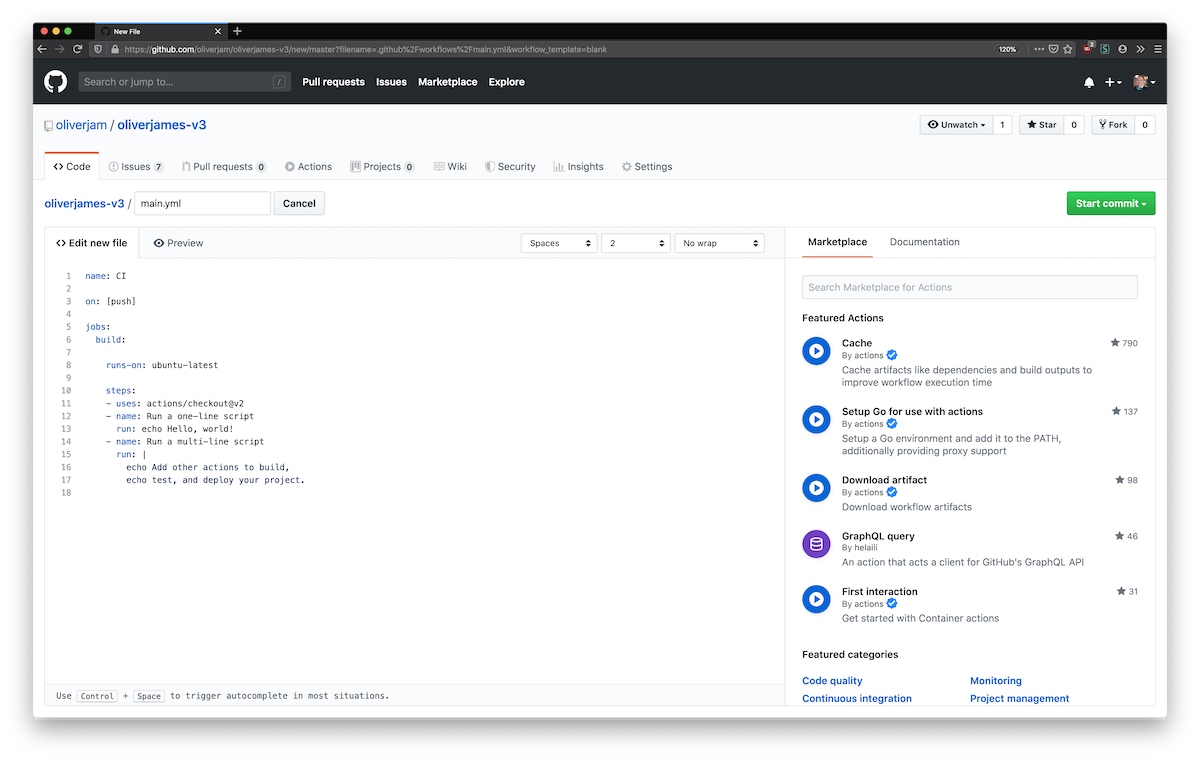
Then click the “Set up a workflow yourself” button. It will give you a boilerplate yaml file in a nice UI that’s part text editor and part GUI, with the docs visible on the right.

The default file looks like this:
name: CI

on: [push]

jobs:
  build:
    runs-on: ubuntu-latest

    steps:
      - uses: actions/checkout@v2
      - name: Run a one-line script
        run: echo Hello, world!
      - name: Run a multi-line script
        run: |
          echo Add other actions to build,
          echo test, and deploy your project.
This creates an Action that runs whenever someone pushes to the repo. It will start an Ubuntu machine, load the pre-existing “checkout” Action (which allows this Action to access repo files), then run two tasks, both of which just echo some text.
We don’t need access to the repo files, so we can remove the - uses line. We also only need a single step, so we can delete the second.
name: CI

on: [push]

jobs:
  build:
    runs-on: ubuntu-latest

    steps:
      - name: Run a one-line script
        run: echo Hello, world!
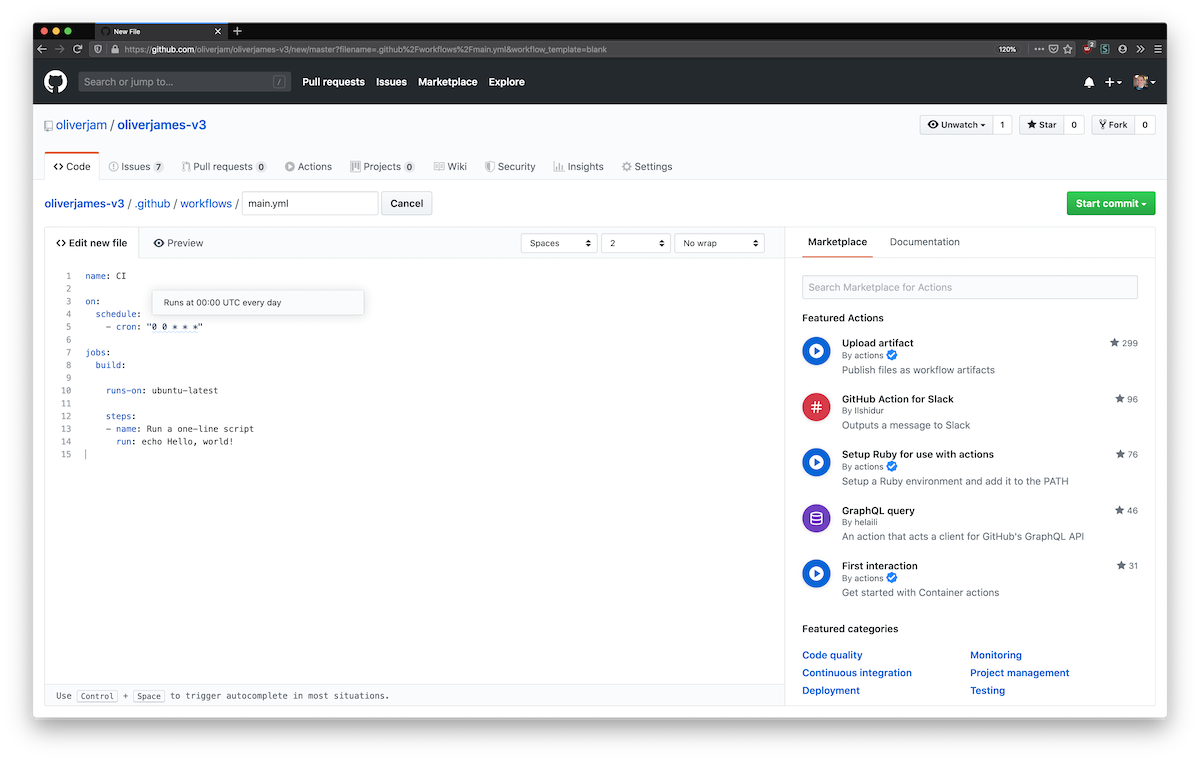
We want to change the on section to use a schedule instead:
name: CI

on:
  schedule:
    - cron: "0 0 * * *"

jobs:
  build:
    runs-on: ubuntu-latest

    steps:
      - name: Run a one-line script
        run: echo Hello, world!
The GitHub Action editor is nice enough to show you what time your confusing CRON syntax refers to when you hover, which is very helpful. So this Action will now run every day at midnight (UTC). By default scheduled Actions run against the default or base branch of the repo (here Master), which is what we want to deploy.

The final step is changing the run line so the Action actually hits our Netlify deploy webhook.
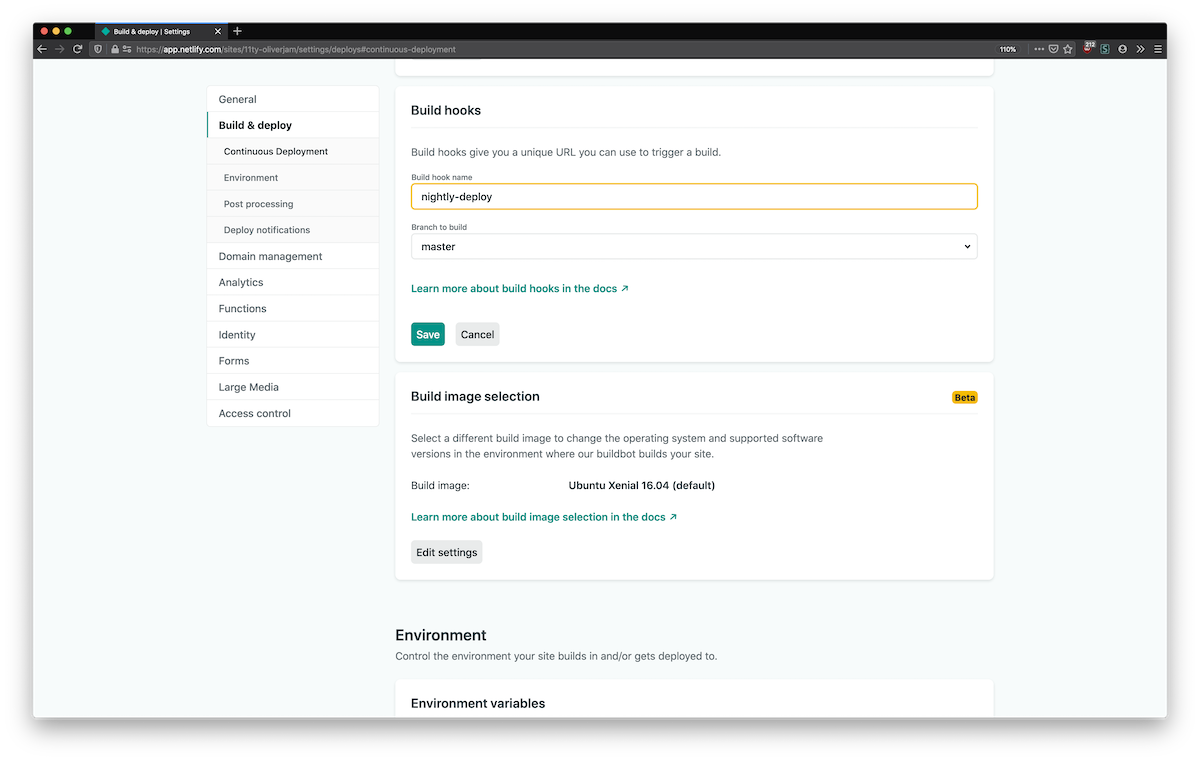
First we create the hook in our Netlify admin UI (in Settings > Build & deploy > Build hooks. Click the “Add build hook” button, then name your hook. Save the hook and Netlify will show you the webhook URL.

If you click the URL it will also give you an example curl command, which is what we want for our Action. Go back to your Action file and replace the echo Hello, world! with the curl command. We can also give it a more descriptive name.
name: CI

on:
  schedule:
    - cron: "0 0 * * *"

jobs:
  build:
    runs-on: ubuntu-latest

    steps:
      - name: Nightly deploy
        run: curl -X POST -d {} https://api.netlify.com/build_hooks/1234
That’s it! Commit the Action file and wait for the scheduled time to hit. I’ve found they usually run between 2 and 5 minutes after the scheduled time, so bear that in mind.